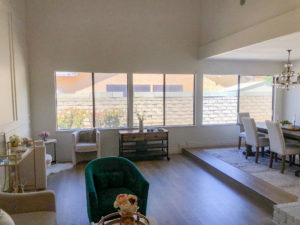
If I knew how easy it would be to make a DIY curtain rod, I would have done this project a lonnng time ago. Our home has a HUGE wall of windows (I’m talking 22 ft worth of windows) and I knew I wanted a custom curtain rod look. Well if you’ve ever tried to buy a 22 ft curtain rod you know you could be spending upwards of $500 per rod. Which as a DIYer, I thought “no freaking way! I’m going to make my own DIY Curtain Rods AND they’re going to look just as good as the store bought ones.” Turns out my optimism paid off!
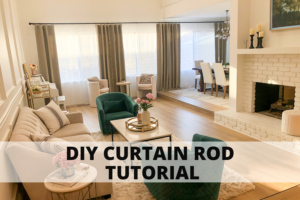
Here is my tutorial on how to create the most amazing DIY Curtain Rod!
(If you like this post you may also like How To Paint Window Trim)
What you need:
- Electrical Conduit
- Dowels
- Brackets
- Finials
- Spray paint
- Scratch protectant spray
- Liquid nails
- Pipe cutter
- (optional) Stud Finder
Step 1: Measure the windows to see how long you’d want your curtain rod
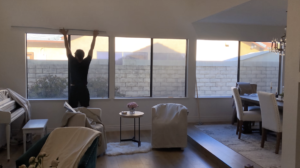
I like to start the curtain rod as close to the ceiling as possible (leaving at least a 1″ gap). If you want to create a more dramatic look, you could also make the curtain rod wider than the window. that way when your curtains are
open, you have the widest/tallest view out your windows. See pic below for reference.
Step 2: Figure out how many pieces of electrical conduit you will need for your project
If you have a long span of multiple windows you may need more than one piece of electrical conduit. In this case, you will likely need more than 2 brackets for the ends of the curtains. We ended up using 5 brackets. These brackets are a great place to plan for your co
nduit to join together so that you have less of a chance of seeing the seam between the 2 pieces of conduit.
Step 3: Cut the conduit
The easiest way to cut your conduit would be using a pipe cutter. Make sure you find a pipe cutter that is compatible with the conduit diameter size you are using.
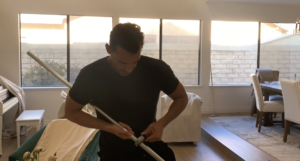
Step 4: Screw curtain brackets to the wall – Find studs if possible
The longer your curtain rod is, the heavier it will be. If you are lucky enough to find studs – AMAZING! If not, you will need to use drywall screws for your brackets. The longer your curtain rod is, the more brackets you will need to support the weight (especially if you’re doing two curtain rods like we did!). The material and size of the curtains you are buying will impact the weight load on your brackets as well.
(If you like this post, you may also like: DIY WALL PANELS)
Step 5: Spray paint your electrical conduit
This is where you start to see the transformation take place! Once you’ve chosen a color for your curtain rods, make sure to buy spray paint in a SATIN finish that can be used on metal. Here are some of my favorite spray paints below.
Find a place with good ventilation, preferably outside, where you can spray paint your electrical conduit. We used our dowels to hang the conduit between two chairs for painting. Don’t forget your safety goggles and respirator!
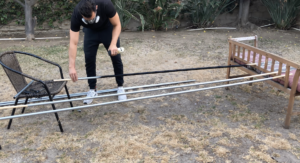
Step 6: Spray a protective coat on top of your paint
Once the spray paint has cured, you’ll want to spray a protective coat over the paint to prevent the curtain rod from scratches. The curtain rings sliding over the paint can create scratches and chips over time. It’s worth it to take that extra time to spray a protective coat so your curtain rod will last as long as possible.
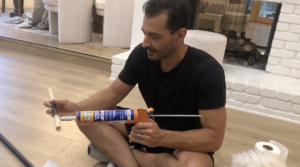
Step 7: Apply liquid nails to dowels
After your protective spray coat has dried, it’s time to start assembling! Apply liquid nails to both sides of the dowel (bring liquid nails to about 1/3 of the way from the edge). Apply liquid nails to one side at a time. After you have the liquid nails on one side of your dowel, slowly insert the dowel into your conduit. Twist the dowel using slow circular motions so that you are applying the liquid nails evenly inside of your conduit. Once you get 1/3 of the dowel inside the conduit, do the same thing on the other side.
Once both sides of the conduit are in place, slowly close the gap between the 2 pieces of conduit so that the dowel is evenly distributed inside each piece of conduit.
If you have any run off from the liquid nails, use a wet paper towel to clean off your curtain rod. Don’t worry if some of the liquid nails color peeks through the seam. We can touch that up with spray paint later 🙂
Wait for the liquid nails to dry. You’re almost done!
Step 8: Hang curtain rod
At this point, you should have a fully assembled curtain rod. If you need to do any paint touch ups, do that before you place the curtain rod on the brackets.
Otherwise, you are ready to hang your curtain rod! Add your curtains and finials to the rod.
Then carefully place your new DIY Curtain Rod on the brackets. Stand back and admire your work 😉

.


