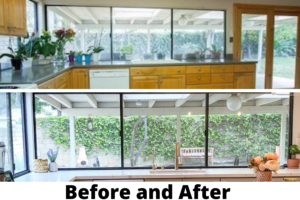
Want to know an easy way to paint window trim for less than $10? This is the easiest DIY tutorial on how to give your windows a major makeover with just a few hours of work!
Buying new windows can be very expensive, so if you’re anything like me, you may want to consider a DIY facelift for your windows instead. As a home owner on a budget, I am giving you the easiest DIY tutorial on how to paint window trim.
You are going to learn how to prep and paint window trim for less than $10!
After learning this DIY tutorial on how to paint window trim, you are going to want to use this window hack on all the windows in your house.
Here’s what you’ll need:
- Spray paint (Make sure you buy spray paint in SATIN finish)
- Painters tape plastic
- Frog tape
- Safety glasses
- Tack cloth (optional)
- Respirator (optional)
- TSP cleaner (optional)
{Related Post: How to Create DIY Wall Panels}
Step 1: Prep, prep, prep!
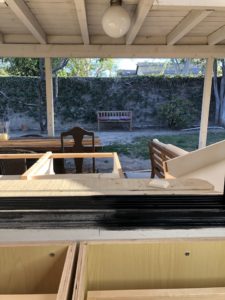
This step takes the LONGEST but it is the most crucial part of this project. Spray paint tends to have quite a bit of overspray, so you want to make sure to cover every surface area nearby that you don’t want to see black paint particles on. (Pro tip: Don’t forget to snap a “Before” picture for your Instagram Window Transformation post 😝)
- Step 1 of PREP: Ventilation
- Open any windows or doors that can help ventilate the room (obviously not the ones you are working on 😝).
- Step 2 of PREP: Clean
-
- Make sure to clean your windows VERY WELL before painting them. There’s nothing worse than doing all the work of prep and paint only to have the paint chip because the windows weren’t clean! A good TSP cleaner should do the job. Also make sure to let the cleaner dry before you move on to paint.

Step 3 of PREP: Cover
-
- Make sure to cover all of the areas near your windows you don’t want the overspray to land. I love using this Painter Tape Plastic for the surface area of the windows, as well as the floor and/or cabinets the windows are nearby.
- Step 4 of PREP: Seal
- Now that all your areas are covered you will want to seal the window edges with yet another layer of protection. This Frog Tape is an amazing option because it really gives you those crisp edges that will make your paint job look professional 🙂
- Step 5 of PREP: Safety
- Spray paint is pretty toxic so you will want to wear some protective safety gear before beginning. Safety goggles are a must with this project to protect your eyes, especially if you are spray painting indoors. Here’s a link to my favorite safety glasses from Amazon. You’ll also want to wear a respirator or face mask to make sure you are not breathing in any of the spray paint fumes. (I’d recommend a respirator over a cloth mask for this project – they are inexpensive and a great buy if you are planning on doing other DIY projects).

Step 2: Paint the window trim
Before you start spray painting, I’d recommend doing a once over on all the windows with a tack cloth to remove any excess debris that may have been left behind after cleaning.
Now that we are super sure the windows are clean, we can FINALLY start the fun part – PAINTING!
- Step 1 of PAINT: With all the windows closed, take your spray paint (whatever spray paint you use, make sure to get a satin finish) and begin spraying light coats of paint on the trim. It’s okay to layer the paint, just make sure you are doing thin coats in order to prevent the paint from running.
- Step 2 of PAINT: Once the spray paint is COMPLETELY dry, open the windows and begin painting the track. Make sure the track is clean as well. If it’s not, do the same prep mentioned in Step 1 of this article using TSP cleaner.
Step 3: Peel and enjoy
Now for the best part comes! This is where you get to peel off all the painters tape/ plastic and take your Instagram “After” picture. VOILA! Just like that you have brand new windows for way less than you’d have paid for new ones 🙂
Don’t forget to tag me in your Instagram Before and After pics!!
This post was all about How to Paint Window Trim.
Other Posts You May Like:
How to Create DIY Wall Panels

How to Paint Your Bathroom Vanity
Shop this post:


